It’s not stupid, if it works!
I generally tell people that I am a “people” photographer - events, weddings, portraits, they’re all about the people, and that’s what I photograph the most.
But I love photography as a whole, and if it happens to scratch an itch to try something technical or challenging, I am even more excited!
Product photography offers a diverse range of challenges, and I love it!
I don’t have a dedicated studio space, but I’ve got a kitchen table, some lights and I watched a lot of Blue Peter as a kid - what can I do in a few hours to show off a product?
Well today I am going to give you a peak behind the curtain, show you my janky setups, the RAW unedited images and the final result, and walk you through my process and the hiccups I encountered along the way.
Challenge One - Swimming Pool in the Kitchen
I want to create one of those classic “Holiday Vibe” photos, where perfume, or suntan lotion is resting in a shallow pool, kissed by warm sunlight.
Well I live by the sea…but that’s not a very controllable environment, and I want to control the light, positioning, water level etc.

Camera mounted over my "pool"So a Pyrex dish, it’s great for lasagne, and it also makes for a great pool! Stick some blue card underneath, that will hide the table and give it more “pool vibes”. However it’s not very convincing, it needs another element.
Ripples, you’d expect them in a pool, and they create beautiful light patterns called caustics - so I removed the soft box from my light, to give it that harsh Sun like direct light effect and proceeded to tap the water with my hand, making a mess of the table and the general area - but I got the ripples I needed!

Cropping is going to REALLY help with the illusion!I added one of my LED tube lights in just to add a little fill light to the side of the bottle, and with some colour grading, cropping and touching up in Photoshop, got the result I desired.

The final image - No kitchen table in sight!Challenge Two - Nice Background, Controlling Reflections.
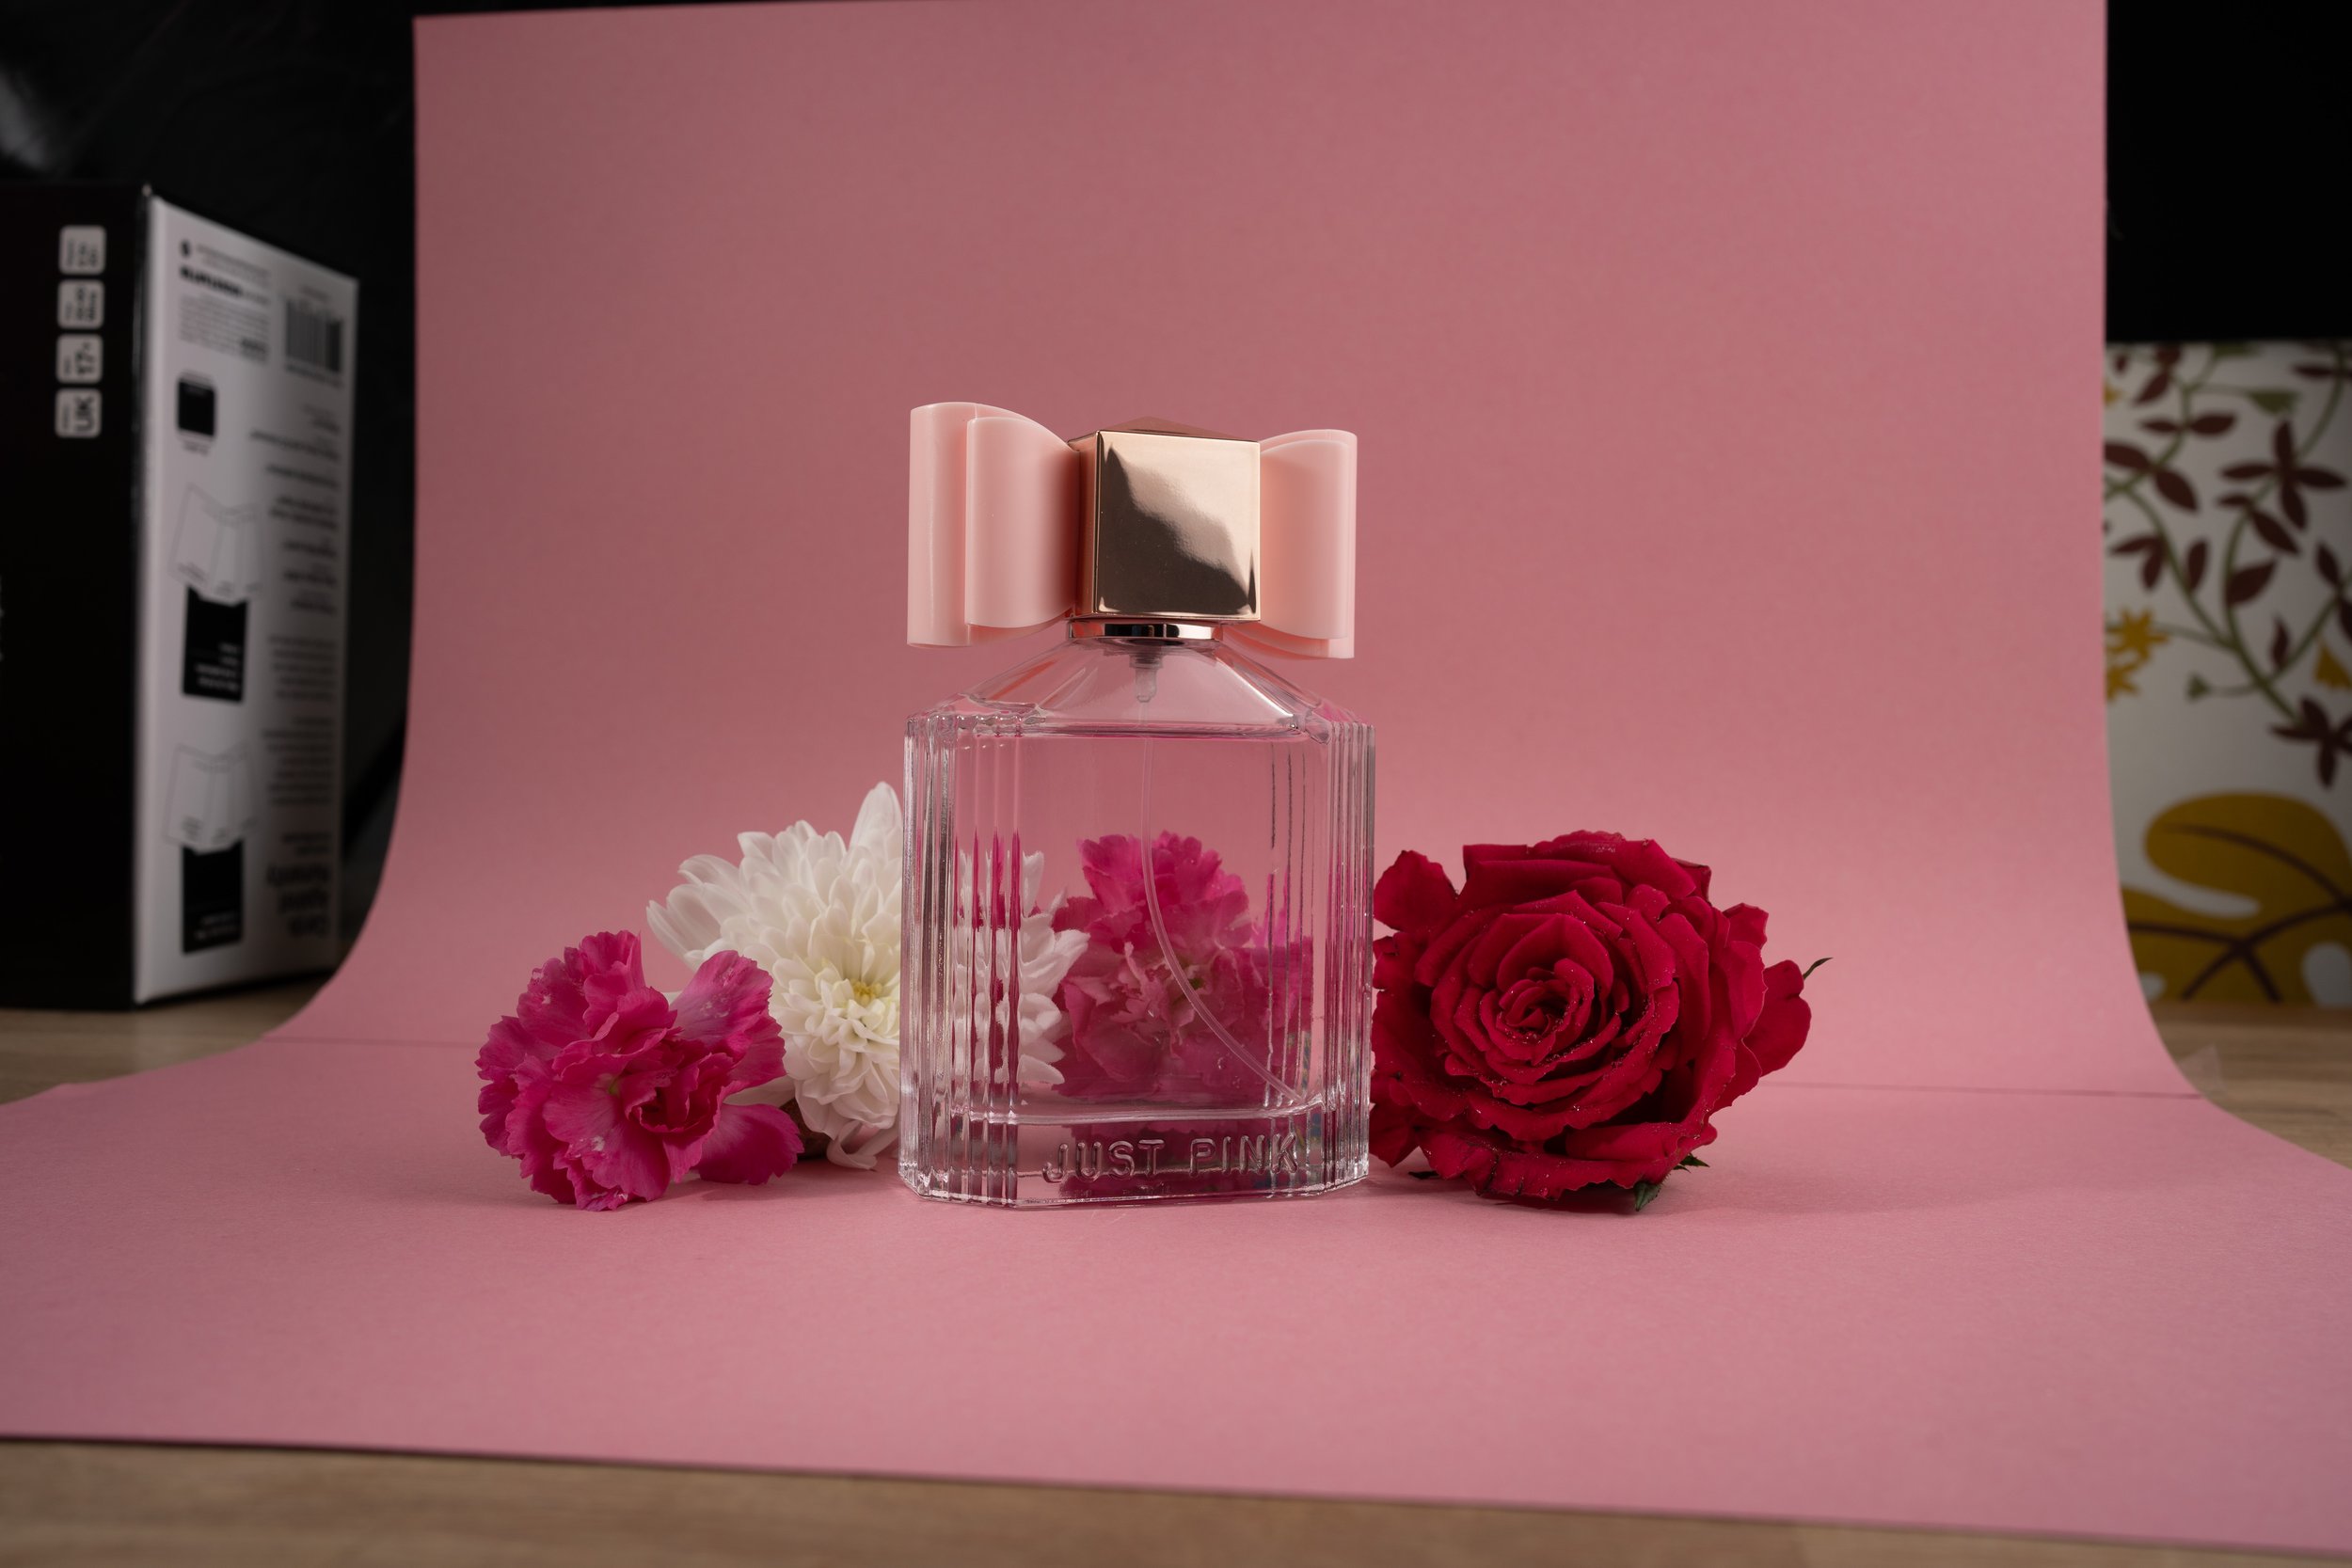
Back at the kitchen table - this time with a perfume called “Just Pink!”.

Cropping is going to be a hero once again!Again I’m just working with whatever I’ve got laying around the house to make this photo - and despite having a very lovely kitchen/lounge space, it’s not suitable for this product, I need a background.
I’ve got some multi-coloured card left from a few projects, and some of it’s pink - perfect!
I tape two bits together, and curve it gently to create a smooth transition along the horizon line, going from foreground to background. Just how am I going to prop it up? Thankfully some boxes of Cards Against Humanity are just the right size, voila - curved pink background.
Card, sticky back plastic and a board game prop...
The scene needs more than just the bottle on its own, and whilst clearing the table of bits for this project, I moved a vase full of flowers, and they had the perfect colours for this image.
Lighting is straight forward in this scene, a very simple one light setup. I’ve got a soft box on my AD400 pro light, above and to the right, it creates a nice reflection and a soft flattering light, and with a reflector on the opposite left for fill.
The last challenge with this image was the bottles cap - it’s very reflective and you could see the kitchen in it. I got the soft box reflected in half of the cap and I like how it shows it’s shiny - but I need to remove the kitchen. Cue more cardboard! I just held a bit whilst taking the photo - the correct angle masks the kitchen, it’s really not stupid if it works!
The rest is just crop, grade and polish in Photoshop!

The finished result.Challenge Three - Cocktails and Photos!
I once made cocktails professionally and it’s something I now enjoy as a hobby, experimenting with ingredients and of course sampling the result is always fun!
Tarquin’s Gin is fantastic and I make my take on a "Bee’s Knees” cocktail with it regularly - so why not photograph it!
The Tarquin’s Dry Gin bottle is a gorgeous blue, with a diffuse reflective wax seal, and the cocktail I make is yellow with a primary ingredient being lemon juice.
So I’ve got a palette which sits nicely at near opposite ends of the colour wheel and I know I want to show off the ingredients to the drink - it’s time to get creative, which is why I really do enjoy this type of photography.
I want the background to be more a part of the image, and I want to play with that nice colour wheel situation whilst creating something striking.
I decide to grab - yup, more cardboard, this time yellow and blue, and with those Blue Peter skills tape a lot together to create a split colour background - once again propped up on board game boxes.
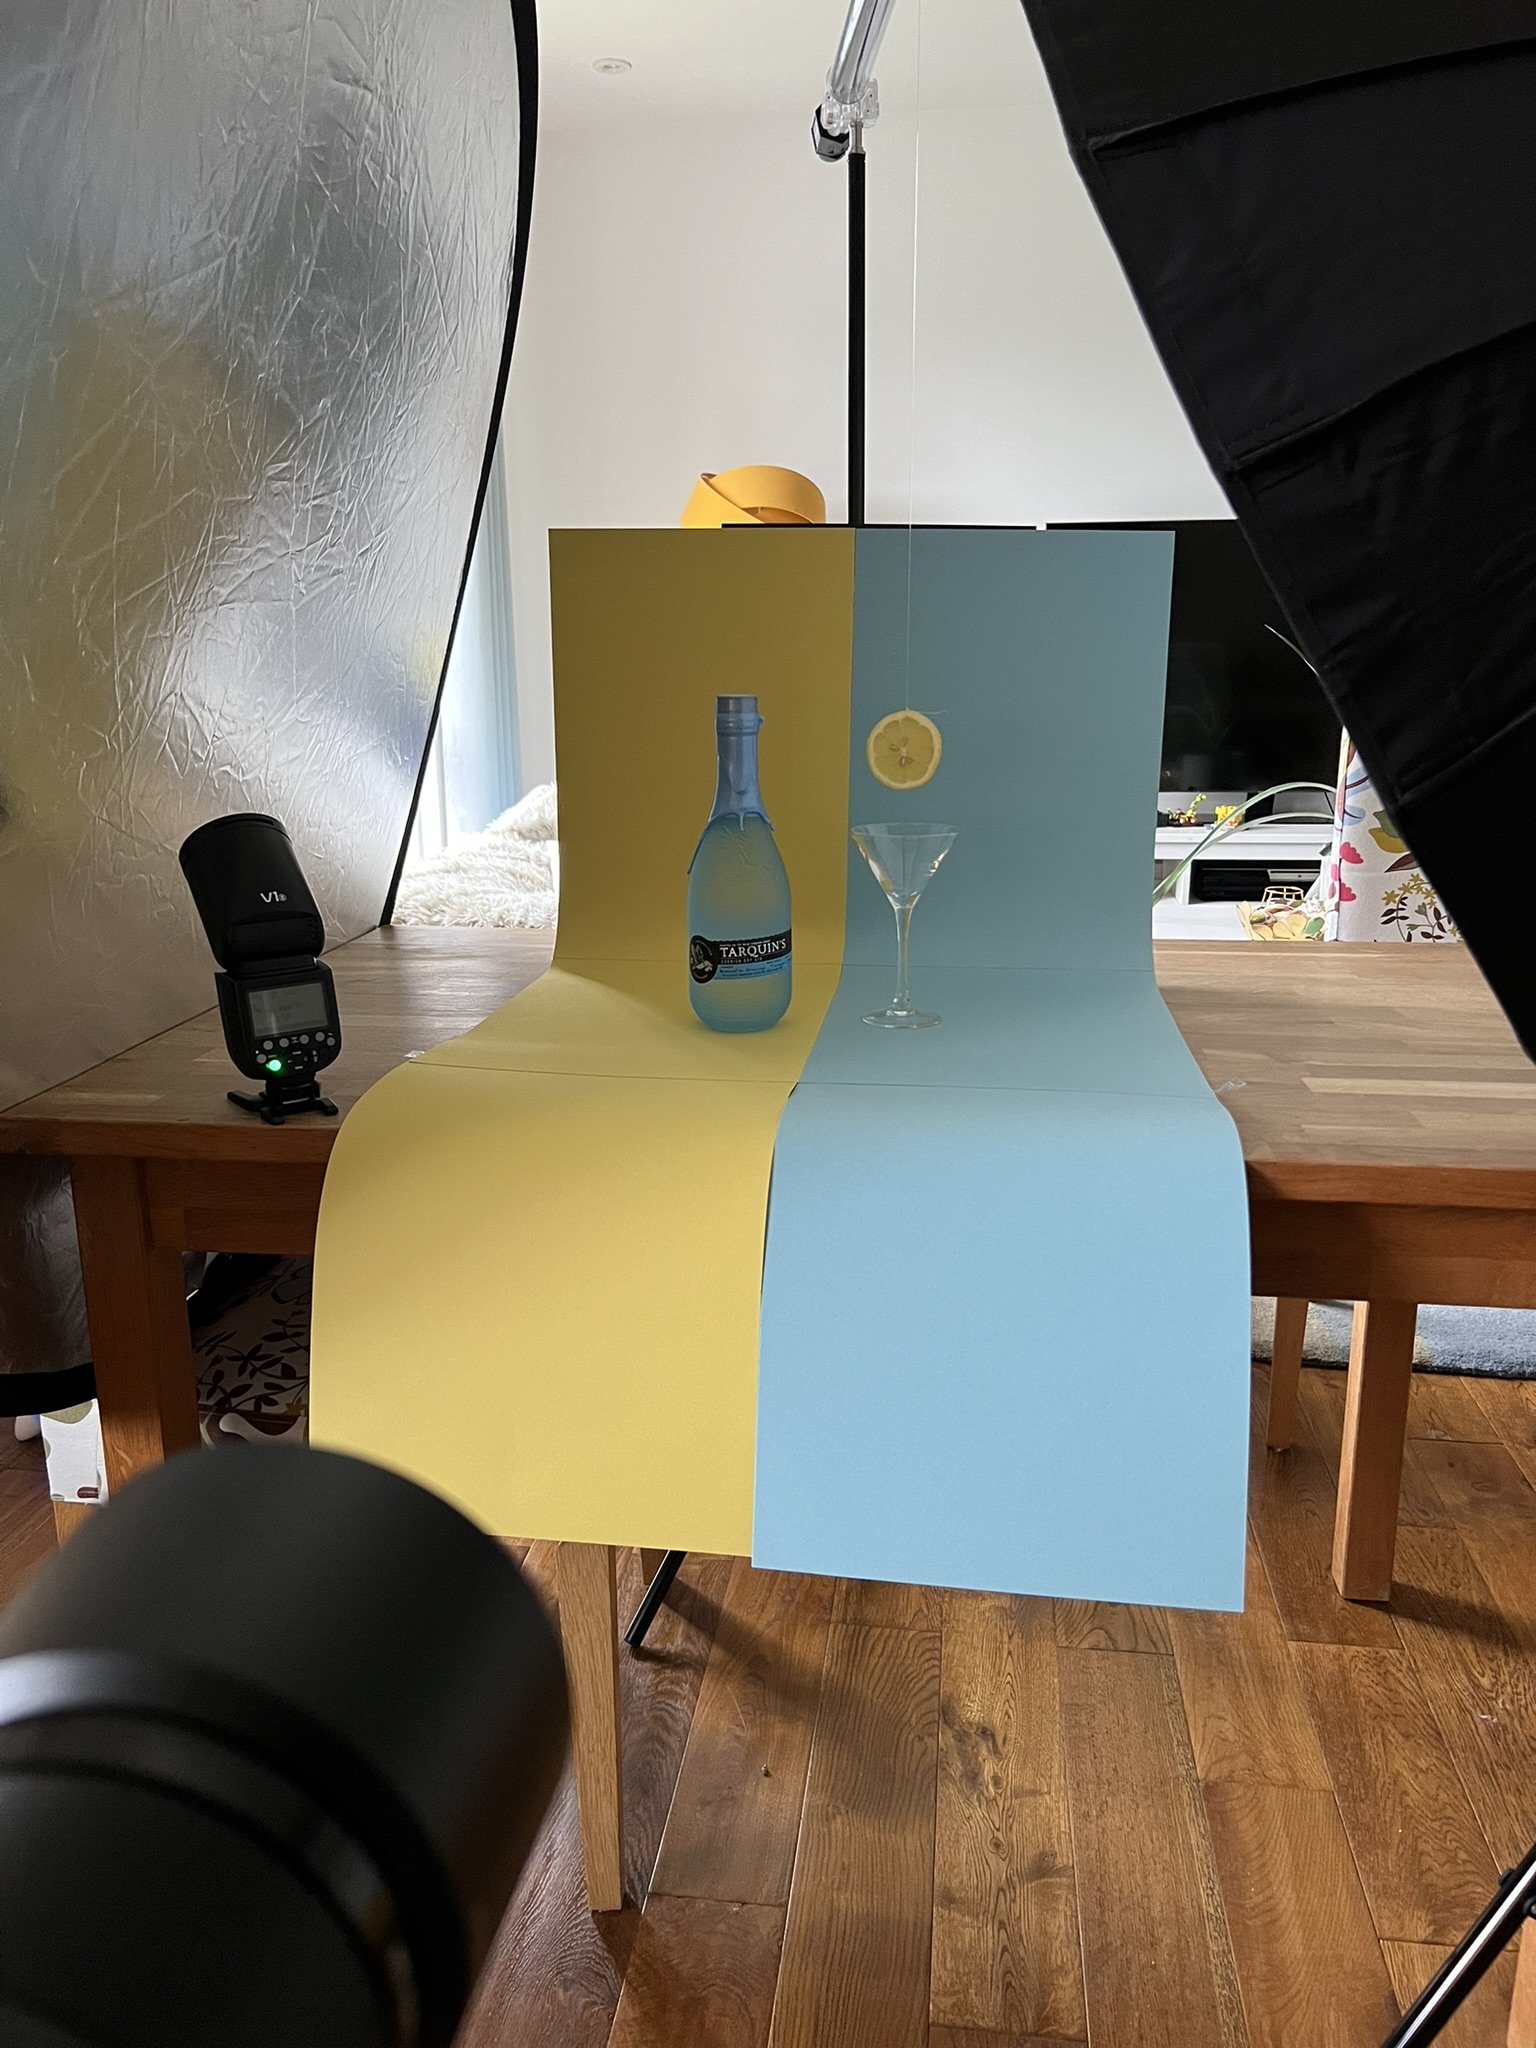
Yes that is a Pavotube being used as a boom arm...Now how to show the ingredients, the bottle of gin is easy, but honey? lemon? Well a lemon slice seems obvious, but sitting it next to glass would lead to an unbalance image and it’s not very inventive.
How about floating above the drink? That way I can have the honey dripping off it, which shows the honey off better! Perfect, but how?
I have fishing wire, which will be easy to remove in post, but how to hang the lemon in the right spot? I have a spare small stand, but no boom arm. Once again, it’s not stupid if it works! I have a clip for my tube light that screws in to that thread, so if I balance it right, I can use the light as the boom arm and suspend the lemon slice from that!
Now all I have to do is pour honey over the lemon, and I’ve got the shot? Well no, this is going to need a composite image as I won’t get the exact shot I want first time, and multiple tries are going to make a mess of the drink if it stays under there.
So first I shoot the unopened bottle with a glass for reference, the lemon suspended above. Next I shoot with the cocktail made and under the lemon, with some slight lighting adjustments.


Next I remove the cocktail, put some plastic down to make cleaning easier and start pouring honey over the lemon, until I get a pour I like. The mess by the end was a little extreme!
Once I’ve got the shots I need to blend, I head in to Photoshop to merge all the images in to one seamless shot, I remove the fishing wire, clean up gaps in the cardboard, remove scuffs and dust on the bottle, glass, surfaces etc After that, I colour grade, crop and adjust the text on the bottle to make it stand out better.

The finished image, and I assure you the drink tasted amazing!Final Thoughts
Three examples of some “Kitchen Table” product photography and three times I’ve found myself really enjoying the challenge of solving problems, coming up with ideas, whilst just using stuff to hand and creating an illusion that sells a product.
I aim to capture most of the image through the camera, but the ability to edit in post afterwards allows you to really sell the effect of high end shoot, even if it mostly involves, tape, cardboard and dodgy solutions to problems.
A good photo lets you make something stand out, so if you want to really make your product shine, I hope this inspires you to find a way to make an interesting photo with just stuff laying around and a little imagination.
Or if you’re not that creative with a camera, hire a professional like me, I promise it’s not always tape and scissors, though hey if it works, it’s not stupid!